When I was growing up, the times I got to spend with my mom, was usually in the kitchen at either our home, or one of my aunt's homes, where she was often asked to cook the meals, as her cooking was much loved by all.
The days that Biryani was made, was usually over a celebration of some sort: Diwali, Prayer functions, Birthday's, Christmas or New Year's Day.... and sometimes for picnics by the sea or the park :-) Or eaten at weddings. Traditionally, Biryani is a celebratory dish, made for special occasions.
When it was being made at home, my mom always said, "Biryani is different from Pilau. You don't cook everything in one pot and wait for it for it to all come together by stiring. The less you interfere with the flavors, the better the chance to develop. Each item is prepared separately, layered into a huge pot and allowed to steam in the oven for four hours. Or, steamed over hot coals on open fires, and that's the BEST KIND!"
Over the years I watched as my mom marinated either meat or chicken or vegetables, cooked the marinated goods separately, fried onions separately, colored and fried potatoes separately, boiled lentils separately, boiled rice separately, and then layered them all together like a Black Forest Cake with herbs and spices and colour.
I have devised a slightly easier method, whilst still retaining the awesome taste and body of Biryani. I will share my version with you all. I had to pay careful attention to quantities to share with you, as I usually do my "dash of this, pinch of that, a lot of this, some of that...etc.."
To make a biryani to serve six people or four very full portions you will need:
Ingredients
Now for the marinade prep, which is usually done a night before the intended day to serve the biryani
Marinade method
Mix all the ingredients with a large spoon, coating the chicken and potatoes well. Cover the air tight container with the lid and store in the fridge over night, to cook the next day or even two days later.
Lentil prep
Rice prep
Onion Prep
In a non stick frying pan add the following:
Putting it all together - Usually the night before serving.
Soak saffron in 1 cup boiling water
Pre-heat oven to 180 deg cel. Ensure shelves are adjusted to fit in the pot
Once the spices start to roast in the oil, add the marinated chicken and stir in to coat with the heated oil and spices.

Put the pot into the oven and leave to steam for two hours uninterrupted. After two hours, remove the pot from the oven, carefully removing the lid and the foil avoiding the steam (it could burn you). At this point, the rice would have cooked through.
Remove from the oven and set aside without opening the foil or the lid and leave to rest for 30 minutes to an hour for the flavors to develop.
When Serving
Remove the lid and the foil, carefully dish up the top layer of coloured rice into a separate dish. You will notice that the bottom layer now has some rice as well, which you can carefully mix (like digging soil around a pot plant while rotating the pot in a circular motion) The chicken and potatoes will be quite tender so, be careful how you handle it.
Place some of the spiced meat and rice on the plate and then top with the coloured rice.
Serve with raita and your choice of pickles or dhal.
Indeed a labor of love :-)
Happy labor of Love to all who will attempt Biryani, the Homemade way. :-)
The days that Biryani was made, was usually over a celebration of some sort: Diwali, Prayer functions, Birthday's, Christmas or New Year's Day.... and sometimes for picnics by the sea or the park :-) Or eaten at weddings. Traditionally, Biryani is a celebratory dish, made for special occasions.
When it was being made at home, my mom always said, "Biryani is different from Pilau. You don't cook everything in one pot and wait for it for it to all come together by stiring. The less you interfere with the flavors, the better the chance to develop. Each item is prepared separately, layered into a huge pot and allowed to steam in the oven for four hours. Or, steamed over hot coals on open fires, and that's the BEST KIND!"
Over the years I watched as my mom marinated either meat or chicken or vegetables, cooked the marinated goods separately, fried onions separately, colored and fried potatoes separately, boiled lentils separately, boiled rice separately, and then layered them all together like a Black Forest Cake with herbs and spices and colour.
I have devised a slightly easier method, whilst still retaining the awesome taste and body of Biryani. I will share my version with you all. I had to pay careful attention to quantities to share with you, as I usually do my "dash of this, pinch of that, a lot of this, some of that...etc.."
To make a biryani to serve six people or four very full portions you will need:
Ingredients
- 1.5 kg of chicken (Braai packs are quite convenient doing away with the backs/spines of the chicken, yielding more edible portions of chicken)
- 1.5 cups Basmati rice
- 1/2 cup of black lentils (mansoor dhal)
- 3 large onions chopped - not too fine
- 3 potatoes peeled and cut in quarters
- 9 large cloves of fresh garlic - either finely grated, crushed with pestal & mortar, or with a crusher
- Half an index finger sized fresh ginger - either finely grated or crushed with pestal & mortar
- 3 hand fulls of fresh mint
- 2 hand fulls of fresh coriander
- 5 sprigs of fresh thyme
- 10 curry leaves
- 5 full teaspoons of Homemade Garam Masala or Indian store bought
- 3 Star Aniseed
- 6 sticks of cinnamon
- 9 cloves
- 1 Teaspoon freshly grated nutmeg
- 2 Bay leaves
- 12 Cardamon pods (green) or 2 teaspoons cardamom powder
- 3 heaped tablespoons of roasted cumin seeds & 1 tablespoon of roasted cumin powder
- 1 teaspoons of roasted fennel seeds and 3 teaspoons of fennel powder
- 2 Tablespoons of roasted coriander powder
- 3 teaspoons Tumeric powder
- Egg yellow food color (powder form and liquid)
- Red food color
- Green food color
- Few strands saffron
- 1/2 teaspoon of Hing (Asafoteda)
- 3 heaped teaspoons of Osman's Taj Medium Roasted Curry powder
- 3 heaped teaspoons of Osman's Taj Ginger garlic masala or biryani masala
- 1/2 cup of either buttermilk, greek yoghurt or sour milk (Inkomasi)
- Salt to season
- Oil
- Ghee or butter
- 1 teaspoon saffron strands
 |
| Grater for nutmeg |
Now for the marinade prep, which is usually done a night before the intended day to serve the biryani
Marinade method
- Cut up and wash the chicken pieces, place it in a colander to drain off excess water
- Wash a hand full of each herb (mint & coriander) and chop finely
- Drained and chopped chicken
- Quartered potatoes
- Handful of each chopped herbs (mint & coriander)
- teaspoon of Homemade Garam Masala
- 3 tablespoons of Osman's Taj Medium Roasted Curry powder
- 3 tablespoons of Osman's Taj Ginger garlic masala or biryani masala
- 1/2 cup of either buttermilk, greek yoghurt or sour milk (Inkomasi)
- 1 star aniseed
- 3 cardamon pods or 1 teaspoonful of cardamom powder
- 1 bay leaf
- 3 cinnamon sticks
- 3 - 4 curry leaves
- 1/2 teaspoon Grated nutmeg
- 4 cloves
- 1 teaspoons of roasted fennel seeds
- 1 teaspoon of fennel powder
- 1 heaped teaspoon of roasted cumin seeds
- 1 teaspoon of roasted cumin powder
- 1 heaped teaspoon of roasted coriander powder
- 1 tablespoon of powdered egg yellow
- 1 tablespoon turmeric powder
- crushed ginger and garlic
- 1 sprigs of thyme
- Salt to season
Mix all the ingredients with a large spoon, coating the chicken and potatoes well. Cover the air tight container with the lid and store in the fridge over night, to cook the next day or even two days later.
 |
| Marinated chicken |
Lentil prep
- Soak the cup of lentils in boiling water early in the morning, or the night before. Once the lentils have swelled up, rinse thoroughly and add clean boiling water to cover the lentils adequately. Add the following: (optional)
- 1 teaspoon turmeric powder
- 1 star aniseed
- 3 cloves
- 1 bay leave
- 2 - 3 cinnamon sticks
- a little salt to season
- 1/2 teaspoon of Hing (Asafoteda)
Rice prep
- Wash rice and soak with boiling water. Add the following ingredients:
- 1 teaspoon tumeric powder (optional)
- 1 bay leaf
- 1 star aniseed
- 3 cloves
- 2 - 3 cinnamon sticks
- 1/2 teaspoon fennel seeds
- salt to season
- Cover the pot with a lid and let it stand until soaked.
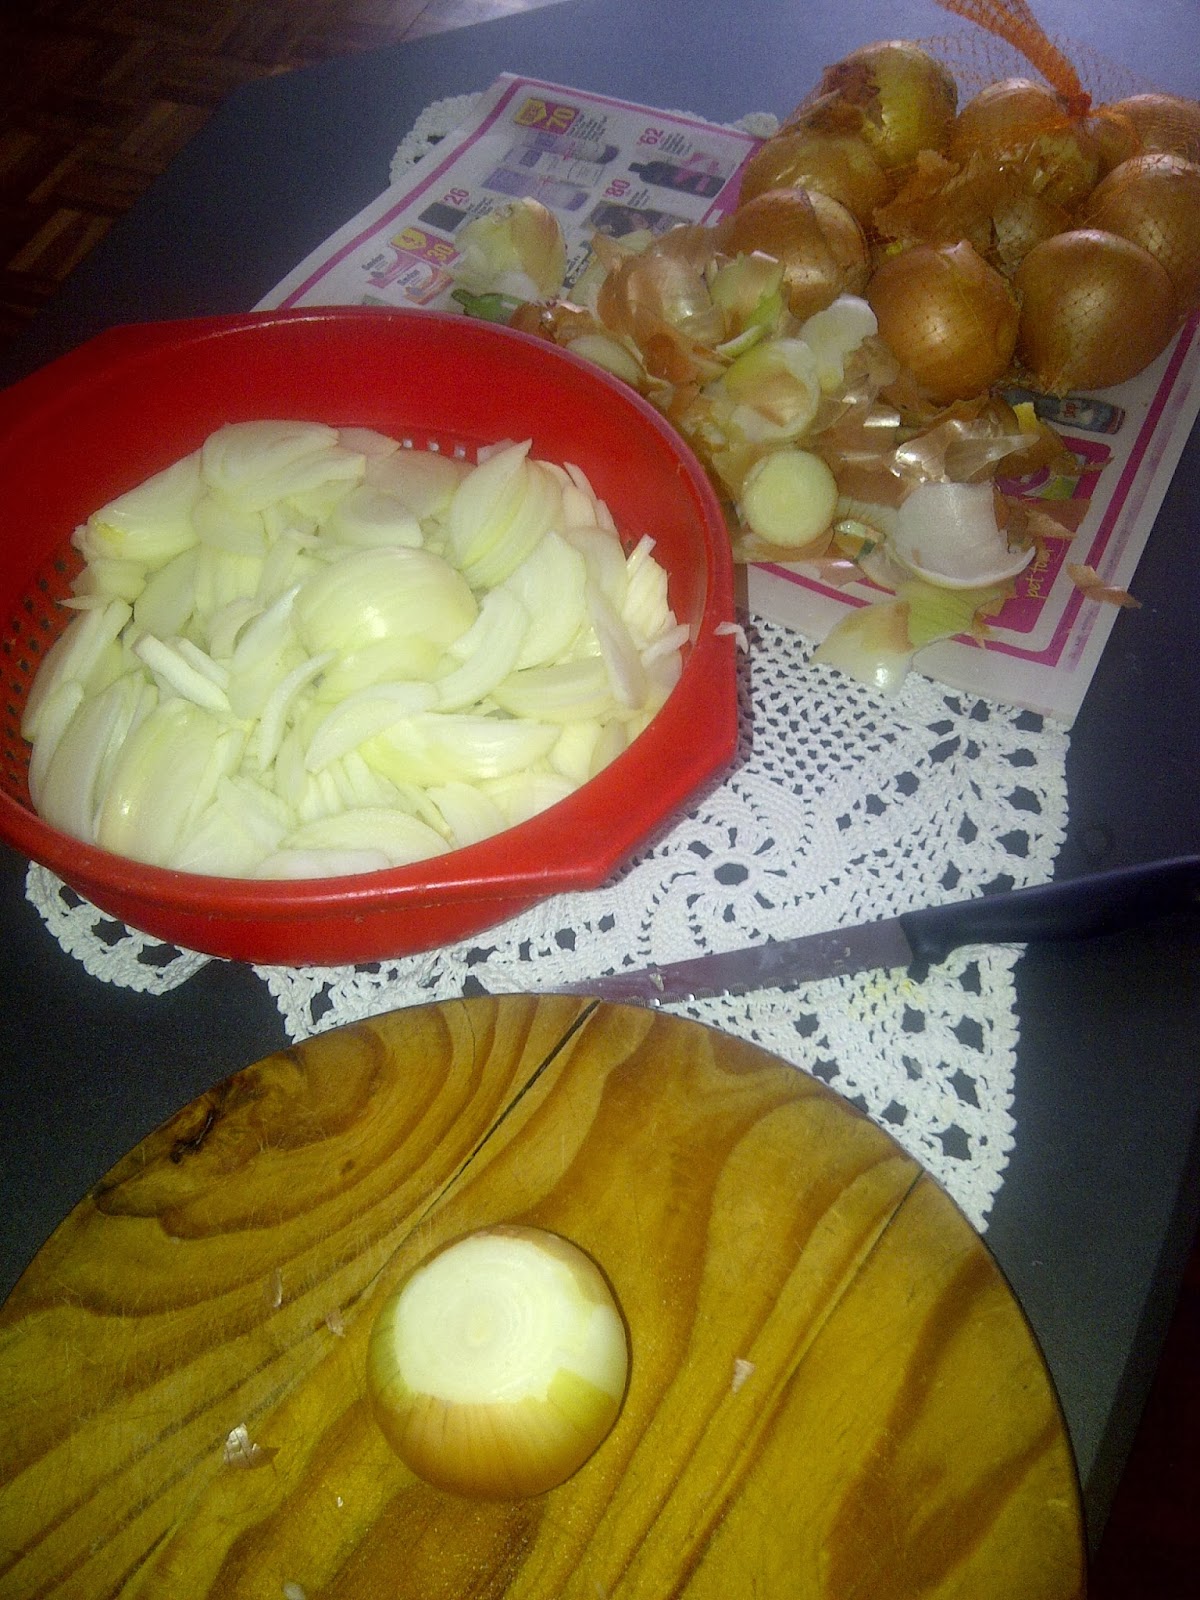
Onion Prep
In a non stick frying pan add the following:
- Oil about 2cm deep and 20g of butter or ghee and heat
- Slice all the onion and fry gently until brown / partly caramalised.
- Set aside.
Putting it all together - Usually the night before serving.
Soak saffron in 1 cup boiling water
Pre-heat oven to 180 deg cel. Ensure shelves are adjusted to fit in the pot
- In a large pot big enough to fit in all the ingredients, put in some oil and ghee - it should just about coat the bottom of the pot. Bring the oil to medium / high heat
- Throw in some of the fried onion about 2 tablespoons
- 3 curry leaves
- 1 star aniseed
- 3 cardamom pods
- 3 cinnamon sticks
- 1 bay leaf
- 3 cloves
- 1 teaspoon Fennel
Once the spices start to roast in the oil, add the marinated chicken and stir in to coat with the heated oil and spices.
- Allow the meat to simmer as you begin the layering process
- Begin layering as follows:
- Sprinkle the lentils to cover the meat and potatoes. Keep 1/3 of the lentils aside.
- Sprinkle Cumin powder in a circular pattern to cover the lentils
- Sprinkle fennel seeds and powder in same manner
- Sprinkle coriander powder in the same manner
- Sprinkle Homemade Garam Masala in the same manner
- Sprinkle cumin seeds in the same manner
- Sprinkle a hand full of each herb (Min & coriader - washed and finely chopped) in the same manner
- Place 5 springs of thyme in the center of the pot
- Sprinkle more fried onion in the same manner - about 2/3 of the remaining fried onion, and keeping 1/3 aside.
- Now start to layer the rice (soaked yet raw) using a slotted spoon reserving aside some of the water it was soaked in.
- once a thin layer of rice has been layered - sprinkle a bit of salt all over the layer of rice.
- Sprinkle fennel seeds, cumin seeds and more garam masala (not too much)
- Layer the remaining rice
- Top with remaining lentils and fried onions, stirring it gently into the top layer of rice.
- Dot with drops of green food color, egg yellow food color, and red food color
- Top with remaining two hand fulls of washed and chopped herbs (Mint & Coriander)
- Dot with butter or ghee
- Add the water 1/2 cup in which the rice was soaked. The water should slightly cover the last layer of rice.
- Add the saffron water to the pot.
 |
| Layering the rice |
 |
| Adding color to the rice |
 |
| Adding the water to the rice |
Cover the pot with tin foil, shiny side under, and close the edges tightly. Place the lid on top of the foil covered pot.
Put the pot into the oven and leave to steam for two hours uninterrupted. After two hours, remove the pot from the oven, carefully removing the lid and the foil avoiding the steam (it could burn you). At this point, the rice would have cooked through.
Remove from the oven and set aside without opening the foil or the lid and leave to rest for 30 minutes to an hour for the flavors to develop.
When Serving
Remove the lid and the foil, carefully dish up the top layer of coloured rice into a separate dish. You will notice that the bottom layer now has some rice as well, which you can carefully mix (like digging soil around a pot plant while rotating the pot in a circular motion) The chicken and potatoes will be quite tender so, be careful how you handle it.
Place some of the spiced meat and rice on the plate and then top with the coloured rice.
 |
| Serving of Chicken Biryani |
Serve with raita and your choice of pickles or dhal.
Indeed a labor of love :-)
Happy labor of Love to all who will attempt Biryani, the Homemade way. :-)